Table of Contents
- Step 1: Run a Baseline Assessment Before Any Plan Is Written
- Step 2: Set the Sports Injury Recovery Timeline With the Athlete
- Step 3: Structure the Sports Injury Rehabilitation Program Around Phases
- Step 4: Prescribe Sport-Specific Rehabilitation Exercises
- Step 5: Measure Progress With Objective Criteria, Not Pain Scores Alone
- Step 6: Apply Athlete Return-to-Sport Criteria Before Clearance
- Step 7: Plan Injury Prevention and Load Management After Discharge
- Common Mistakes That Derail Individualized Rehabilitation Plans for Athletes
- Frequently Asked Questions
Last Updated: October 21, 2026
Step 1: Run a Baseline Assessment Before Any Plan Is Written
Individualized rehabilitation plans for athletes start with measurement, not guesswork. At KINETIKA, we begin every sports injury rehabilitation program with a full baseline assessment so the plan reflects the athlete’s actual movement, not a template.
The intake and assessment checklist we use covers:
- Injury history, sport, position and weekly training load
- Pain location and behaviour during specific movements
- Range of motion on both sides for comparison
- Strength testing of the injured and healthy limb
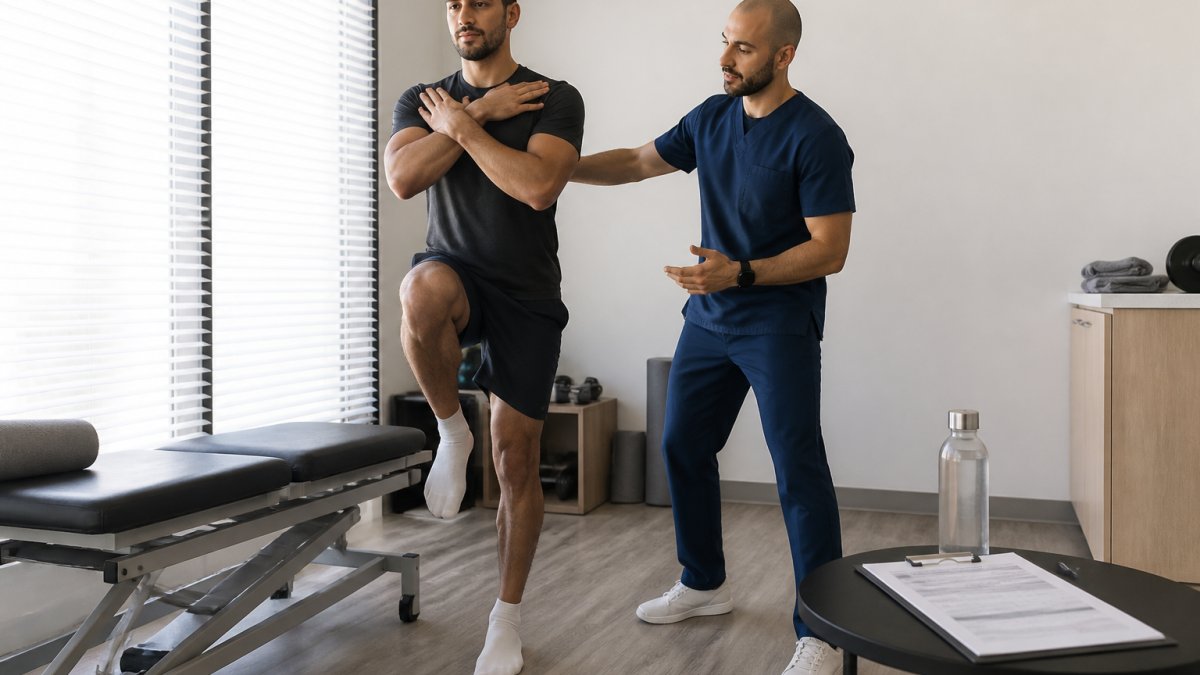
Record the uninjured side first. Athletes often tense up when they know the injured limb is being measured, and a calm first test gives you a cleaner comparison.
Without a baseline, there is no way to prove progress later. That single record shapes every decision that follows.
Step 2: Set the Sports Injury Recovery Timeline With the Athlete
Recovery timelines work best when the athlete helps build them. A sports injury recovery timeline is an estimate of how long each stage should take, based on injury type, tissue healing, sport demands and the athlete’s response.
Break the timeline into phases with review points rather than one distant end date. Explain what could slow progress (missed sessions, poor sleep, early return to loading) and what would move it forward.
Promising a fixed return date before the baseline assessment is done is the fastest way to lose an athlete’s trust. Give a range, then tighten it as objective markers appear.
Step 3: Structure the Sports Injury Rehabilitation Program Around Phases
Every sports injury rehabilitation program should move through clear rehabilitation phases, with progressive loading at each stage. Structure beats intensity here. A phase-based plan protects the injury while steadily rebuilding capacity.
What Each Phase Should Achieve
- Phase 1: Settle symptoms, restore basic range of motion, protect healing tissue
- Phase 2: Rebuild strength and mobility with controlled progressive loading
- Phase 3: Add functional rehabilitation, balance, agility and power work
- Phase 4: Performance-based rehabilitation matched to sport demands
Move to the next phase only when the current one is met, not when the calendar says so. This is where individualized treatment plans earn their keep.
Step 4: Prescribe Sport-Specific Rehabilitation Exercises
Sport-specific rehabilitation exercises are the bridge between the clinic and the field. A runner needs different loading than a swimmer or a footballer. Exercise prescription should mirror the movements, speeds and energy demands of the athlete’s sport.
Build targeted exercise around the actual demands: sprint mechanics for field athletes, overhead range of motion for throwers, change-of-direction control for court players. Add conditioning work early so fitness does not collapse while the injury heals.
The best test of a sport-specific exercise is simple: does it look like something the athlete will do on the field? If not, it is general fitness, not rehabilitation.
Step 5: Measure Progress With Objective Criteria, Not Pain Scores Alone
Pain scores matter, but they are a poor solo guide. Objective criteria give a far clearer picture of athlete recovery, and the difference between a plan that adjusts and one that drifts is whether the clinician has numbers to act on. Re-test the same measures from the baseline assessment at set intervals, commonly every two to three weeks in early phases and weekly once sport-specific loading begins, and compare the results side by side rather than relying on memory.
The Measurement Battery
A practical battery covers five domains, each with a defined benchmark rather than a vague “looks good” judgment:
- Range of motion: measure both sides with a goniometer or inclinometer. A common progression target is within 5 degrees of the uninjured side for the movements the sport demands, with full pain-free range before impact work.
- Strength: use handheld dynamometry or a reliable repetition-maximum test for the key muscle groups. A widely used benchmark is within 10% of the uninjured limb for return to running and within 5-10% before contact or cutting sports, depending on the tissue involved.
- Balance and neuromuscular control: single-leg balance with eyes open and closed, the Y-balance reach test, and single-leg squat quality scored against a written rubric. Asymmetry beyond roughly 4 cm on the anterior reach is a common flag to hold progression.
- Hop and power tests: single-leg hop for distance, triple hop, crossover hop, and a timed 6-metre hop, each expressed as a limb symmetry index. A symmetry index of 90% or above is the usual gate before running and jumping progressions; some protocols require 95% before contact.
Turning Numbers Into Decisions
Record the uninjured side first and keep the testing order identical each time, because fatigue and warm-up change results. Plot each measure against the baseline so the athlete can see the trend, not just hear a verdict.
Test on the same day of the week, at the same time of day, and after the same warm-up. Small inconsistencies in testing conditions produce changes that look like progress but are really noise.
::: (Source: the importance of athlete involvement in goal setting)
Pain monitoring still belongs in the plan, but as one input among several. A simple daily log of pain during activity, pain after activity, and morning stiffness gives the clinician a pattern to interpret alongside the objective battery.
Sample Progression Snapshot
For a field-sport athlete eight weeks after a hamstring strain, a realistic measurement picture might read: range of motion within 3 degrees of the other side, hamstring strength at 88% of the uninjured limb, hop symmetry at 91%, and sprint splits within 4% of pre-injury. That profile supports entering sport-specific running but not yet full-speed sprinting or contact, because strength has not reached the 90% gate.
Step 6: Apply Athlete Return-to-Sport Criteria Before Clearance
Athlete return-to-sport criteria are the specific benchmarks an athlete must meet before full training and competition. Clearance should rest on evidence, not on how the athlete feels that morning, and it should be a shared decision rather than a single clinician’s call.
A Criteria Checklist With Thresholds
A practical checklist pairs each domain with a measurable gate:
- Strength within 90% of the uninjured side for running sports, and within 95% for contact or cutting sports, measured by dynamometry or a reliable repetition-maximum test
- Full, pain-free range of motion on both sides, within 5 degrees of the uninjured limb
- Movement quality restored on a written rubric, single-leg squat, landing mechanics, and change-of-direction control scored consistently across visits
- Hop and power tests at 90% limb symmetry or above, with some protocols requiring 95% before contact
- Sport-specific drills completed at full speed and load for at least two consecutive sessions without symptom flare
Who Decides, and How the Team Coordinates
Clearance works best as a coordinated decision. The physical therapist holds the objective testing data, the physician confirms tissue healing and rules out red flags, the athletic trainer or strength staff confirm the athlete has tolerated full training loads, and the coach confirms the tactical and technical demands the athlete will actually face.
A common failure pattern is the coach hearing “cleared” and immediately restoring full minutes. Build the first weeks back into the clearance itself: a written plan for minutes, sessions per week, and back-to-back match exposure, with a review point after the first two competitive appearances.
Returning an athlete to full load before sport-specific drills are pain-free and controlled is the single biggest cause of recurrence we see. The cost is weeks, sometimes months, back at phase one.
Psychological Readiness and Shared Decision-Making
Fear of re-injury is real, and it changes how an athlete moves, guarded landing, reduced sprint output, hesitation before cutting. Address it before clearance, not after.
Shared decision-making also means agreeing on what happens if symptoms return. Write the rules down before clearance: what level of soreness is acceptable, how many days of flare trigger a call, and who the athlete contacts first.
Sample Clearance Profiles
A runner twelve weeks after an Achilles issue might meet range of motion and strength gates but still show hop symmetry at 86%, so clearance is deferred and the plan adds plyometric loading with a re-test in two weeks. A court athlete ten weeks after an ankle sprain might meet every physical gate but score low on psychological readiness, so the plan adds controlled cutting drills against a defender before full competition.
Step 7: Plan Injury Prevention and Load Management After Discharge
Discharge is not the finish line. Injury prevention and load management decide whether the athlete stays on the field. Build a maintenance plan with training progression limits, recovery days and a simple symptom-monitoring routine.
Periodization matters. Sudden spikes in training load are a common cause of recurrence. Set weekly load limits, schedule deload weeks, and give the athlete clear rules for when to pull back.
Common Mistakes That Derail Individualized Rehabilitation Plans for Athletes
The most common mistake is skipping the baseline. Without it, plans drift into generic exercise lists. The second is letting pain scores alone drive progression. The third is clearing an athlete on time rather than on criteria.
Other traps:
- Copying another athlete’s plan without adjusting for sport and individual response
- Ignoring psychological readiness
- Dropping prevention work the moment symptoms fade
At KINETIKA, our DHA-licensed team builds individualized rehabilitation plans for athletes in private treatment rooms, with care available in English, Arabic, French and Turkish. For a full picture of how assessment-led care works, see the World Health Organization guidance on rehabilitation and the International Olympic Committee consensus on return to sport.
Frequently Asked Questions
What should an individualized rehabilitation plan for an athlete include?
A complete plan starts with a baseline assessment covering injury history, range of motion, strength, balance and movement quality. From there it sets a realistic sports injury recovery timeline, breaks recovery into rehabilitation phases with progressive loading targets, and lists sport-specific rehabilitation exercises tied to the athlete’s position and demands. It should also define objective return-to-sport criteria, a symptom monitoring routine, and a load management plan for the first weeks back in training. Every element is adjusted to how that individual responds, not copied from a template.
How do physiotherapists decide when an athlete can return to sport?
Clearance is based on athlete return-to-sport criteria rather than time alone. Typical measures include strength testing against the uninjured side, functional testing such as hop or change-of-direction tasks, movement quality under fatigue, and psychological readiness and confidence. The athlete should also have completed progressive loading without symptom flare-ups. Shared decision-making matters here: the therapist presents the results, the athlete reports how the limb feels under sport demands, and both agree on a graded return. A player who passes tests but lacks confidence often needs more sport-specific training first.
Can an athlete keep training while recovering from an injury?
Often yes, with modification. Most rehabilitation phases allow conditioning work that avoids the injured area, such as aerobic base work, core and trunk control, and strength work on the unaffected side. This maintains endurance and functional capacity while the injury heals. The key is load management: your therapist sets what volume and intensity are acceptable and monitors symptoms afterward. Some injuries require near-complete rest from loading in the early phase, so follow the plan rather than training through pain. Continuing smart training usually shortens the recovery timeline compared with full inactivity.
How can athletes reduce the risk of reinjury after rehabilitation?
Reinjury risk drops when discharge is not the end of the process. Keep a maintenance programme of strength and mobility work two to three times weekly, and progress training load gradually rather than jumping back to previous volume. Periodization helps: build in lighter weeks and avoid stacking high-intensity sessions. Continue the sport-specific rehabilitation exercises that target your known weak points, and monitor symptoms for early warning signs such as stiffness or altered movement quality. A short review with your physiotherapist after the first month back in full training catches problems before they become another injury.
Recovering from a sports injury takes more than a generic exercise sheet. If you want a plan built around your sport, your baseline and your goals, our team can help. KINETIKA offers assessment-led care with individualized treatment plans, manual therapy and movement science, and multilingual practitioners in private rooms. Book your assessment today and get a plan that measures real progress.